Autodesk Fusion 360 is a cloud-based CAD-CAM tool adopted by various industries Like Aerospace, Automotive, Medical, etc.
It’s becoming one of the favorite tools for product designers, industrial designers, Hobbyists, and makers.
The reason for its popularity is its easy-to-learn user interface & Strong and growing community.
There are so many possibilities with this CAD-CAM tool.
And in this article, we will guide you on How to move an object to its origin in Fusion 360.
You can use two methods to move an object in Fusion 360.
Checkout the steps you need to follow:
Table of Contents
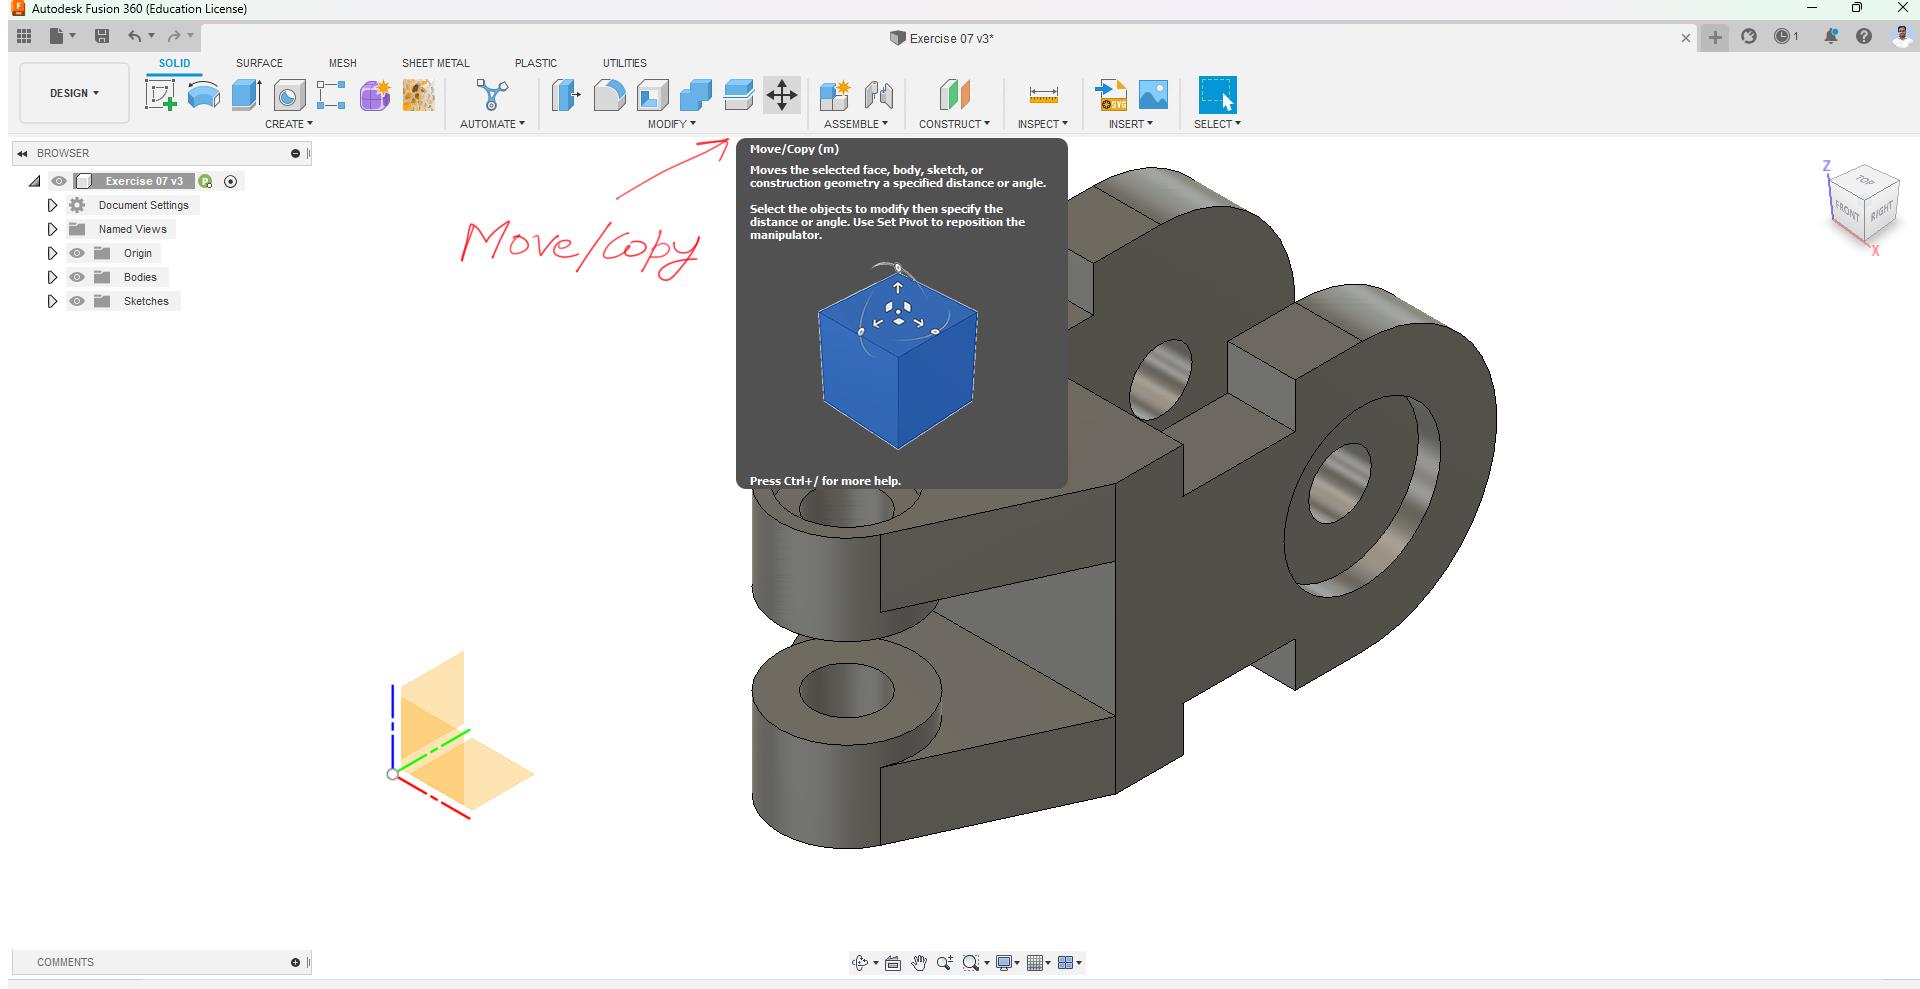
Method 1: Using the Move/Copy tool in Fusion 360.
Step A:
Open your fusion 360 design and make sure that Origin and Bodies are visible, either on the design tree or on the design space.

Step: B
Go to the “Modify” Panel and activate the Move/Copy tool with a single left click on your Mice.
Step C: Final
Once you will activate the Move/Copy tool, a new Move/Copy command window will appear. Where you need to take steps as per the image shown below.
1) Under the Move object: Select “Bodies“
2) Under Selection: Select “Body” that you want to move to origin.
3) Under Move type: Activate the “Point to Point” option.
4) Now activate the “Origin Point” option and hover over to the body and select the point that you want to match with the origin, You can also select custom points on the body by pressing “CTRL” on your keyboard.
5) Now active “Target Point” and select your origin.
And finally, press “OK” to accept the result.
And you can see that your body has been moved to the Origin matching the “Origin Point” on the body you had selected.


Method 2: Using the Align tool in Fusion 360.
Step A:
Go to the “Modify” Panel and activate the “Align” tool with a single left click on your Mice.
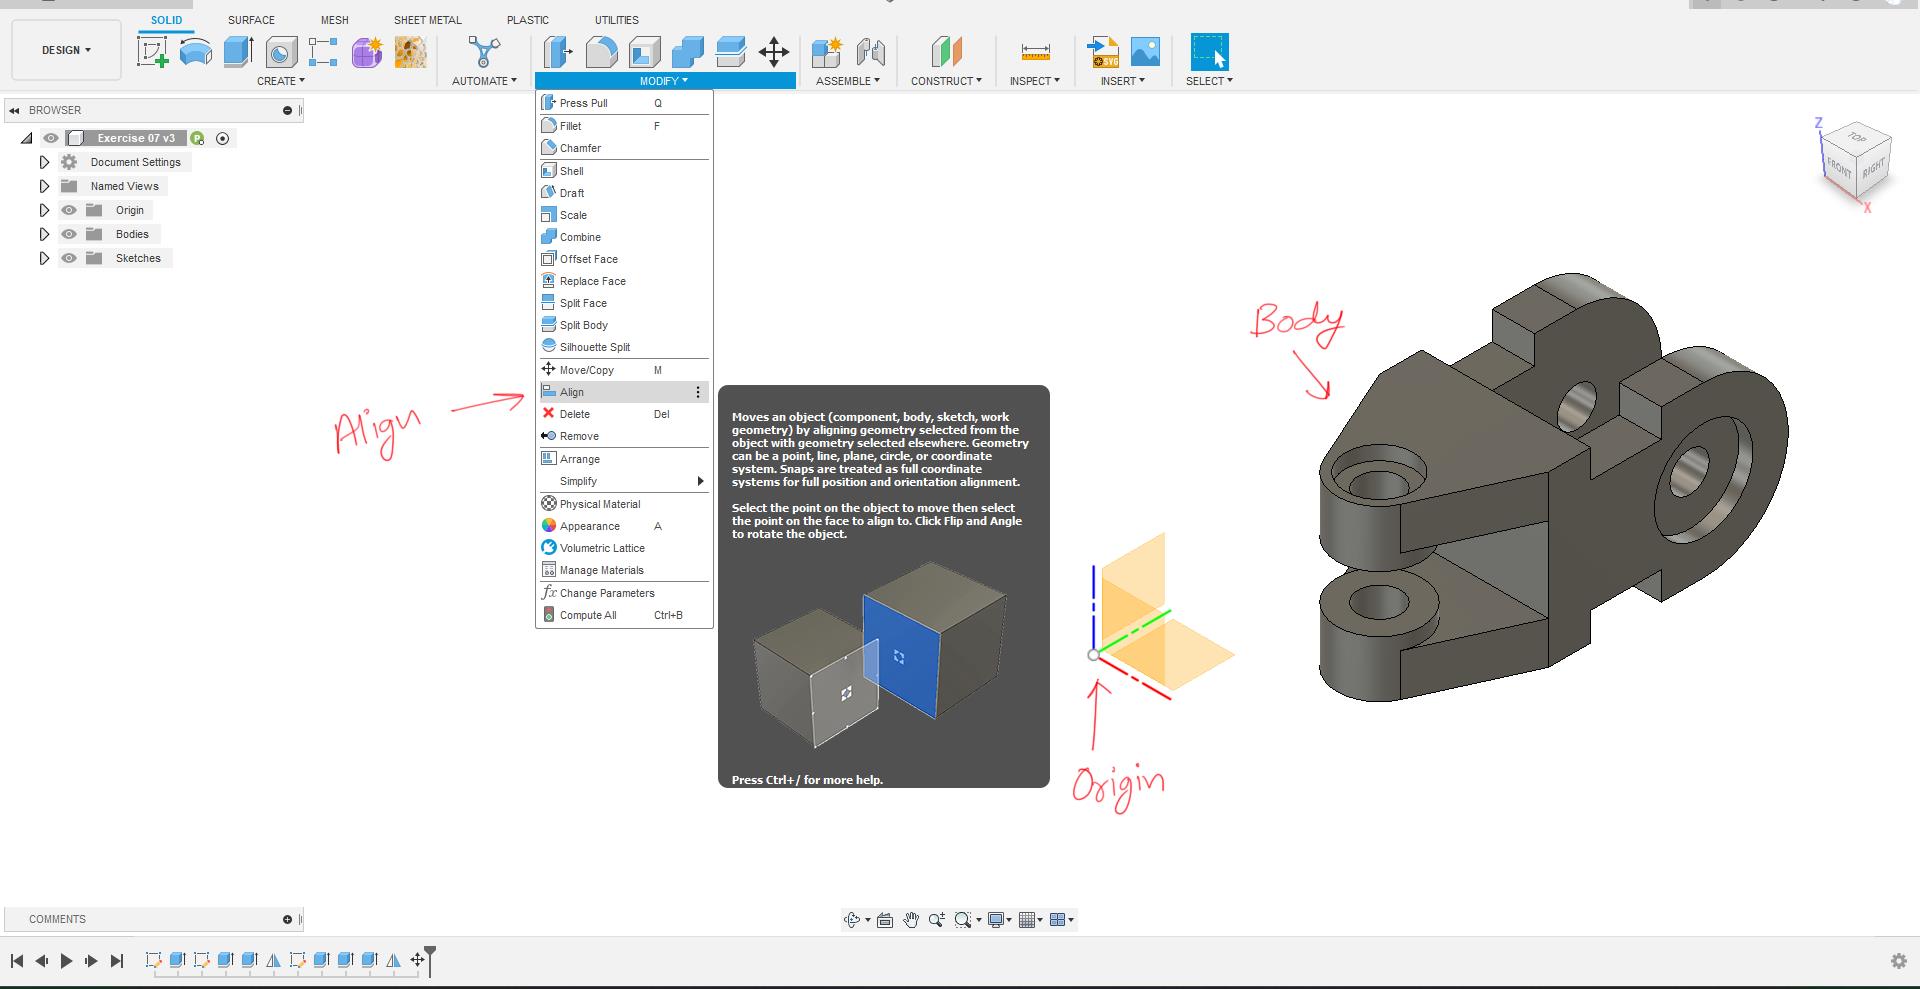
Step B: Final
Once you will activate Align tool, a new Align command window will appear. Where you need to take steps as per the image shown below.
1) Under the Object: Select “Bodies“
2) Now activate the “From” option and hover over to the body and select the point that you want to match with the origin, You can also select custom points on the body by pressing “CTRL” on your keyboard.
3) Now activate the “To” option and select the Origin point.
And you will be able to see the preview that your object/Body has been moved to the origin matching your Body’s Point that you had selected in the “From” option.
Refer to the Image below, You will also get an option to Flip your body around the Origin point.
And if you are satisfied with the results just press “OK.


So, Above are the two methods by which you can move any bodies or components to the origin in Fusion 360.
Also if you have any doubts regarding the above process, check out this Video.
And if you want to learn more about Fusion 360 check out our project-based Fusion 360 tutorial videos.


Thank you!
You Welcome Omar!