Table of Contents
A complete Step-by-Step guide to using the Loft tool in Autodesk Fusion.
Introduction
The Loft tool in Autodesk Fusion is a versatile and powerful feature that enables you to create complex 3D shapes by smoothly blending between two or more sketch profiles positioned on different planes.
In this guide, we’ll walk you through the core process of using the Loft tool to create a shape that transitions from a circle to a square—a common example demonstrating the tool’s flexibility.
The following steps will guide you through using the loft in Fusion to build smooth shapes.
Step 1: Create the First Sketch (Circle)
- Go to Create Panel > Create Sketch.

- Select the XY Plane.

- Use the (C) Center Diameter Circle tool (Create Panel > Circle > Center Diameter Circle).

- Click on the origin to select the Center Point of the Circle.
- Enter a diameter, for example, 30mm, and press Enter.

- Click Finish Sketch.

Step 2: Create an Offset Plane
- Go to Construct > Offset Plane.

- Select the XY Plane to create a New offset Plane.
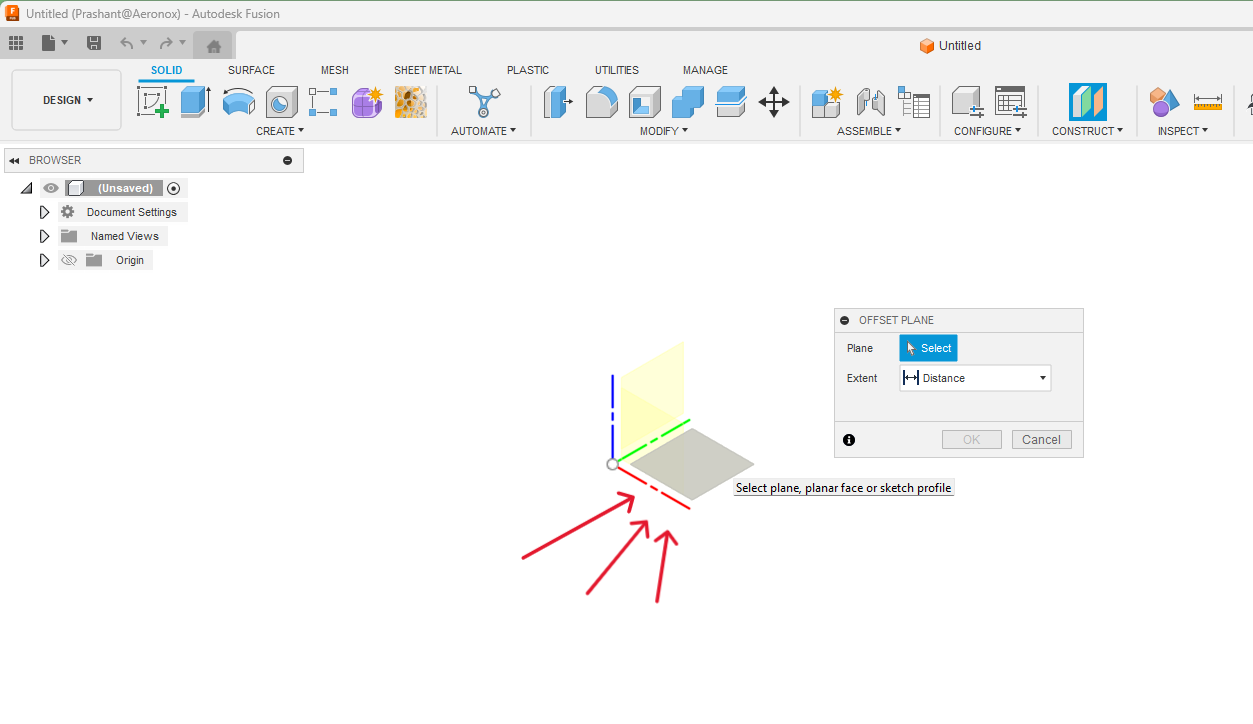
- Enter an offset distance, for example, 50 mm, and press Enter. This creates a new plane parallel to the XY plane, 50 mm above it.

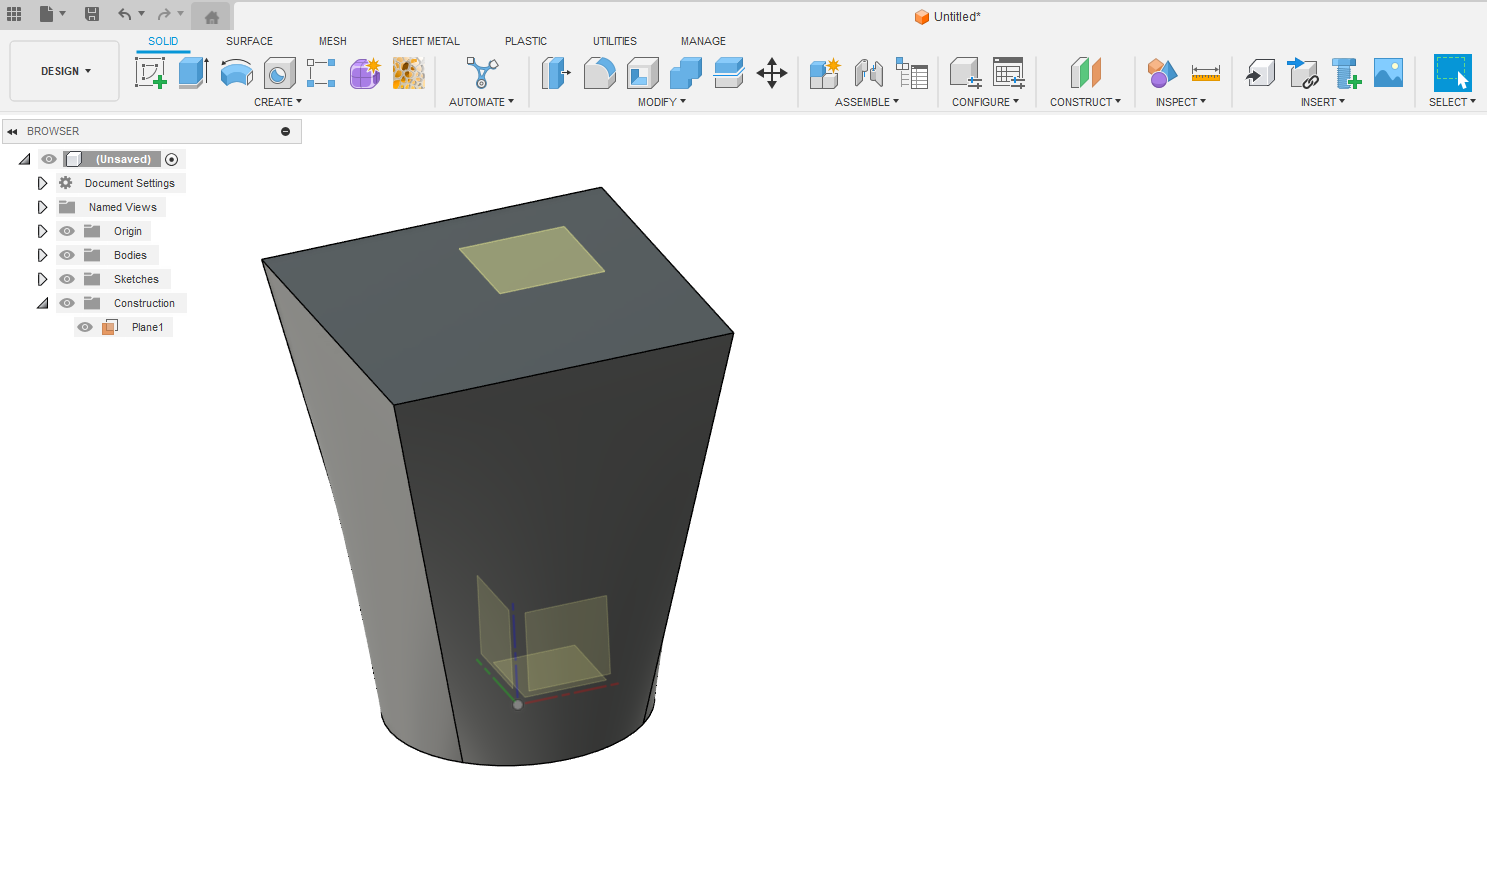
Step 3: Create the Second Sketch (Square)
- Go to Create Panel > Create Sketch
- Select the newly created offset plane as a sketch Plane.

- Activate the Center Rectangle tool (Create > Rectangle > Center Rectangle).

- Click on the origin (the center point).

- Enter the dimensions for the sides of the square. For example, enter 40mm for one side, press Tab, and then enter 40mm for the other side, and press Enter.

- Click Finish Sketch.

Now, you should have two sketches: a circle on the XY plane and a square on the offset plane.

Step 4: Use the Loft tool
- Go to Solid Section> Create Panel > Loft Tool.

- In the Loft dialog box, under Feature, activate the Profile Selection button.

- Select the circle sketch.
- Then, select the square sketch.

Autodesk Fusion will now generate a solid body that smoothly transitions from the circular base to the square top.
Step 5: Final Shape of the design
- Review the preview, and if it looks as you intended, click OK.
- You should now see a 3D model created by lofting between a circle and a square (Refer Above Image)
- Alternatively, you may have a 3D model lofted between a circle, a square, and another circle, depending on your sketch Selection priority.

Conclusion
By completing these steps, we should now see a 3D model created by lofting between a circle → square or a circle → square → circle.
This example demonstrates the basic principle of the Loft tool.
Remember that we can loft between more than two profiles and even use guide rails for more intricate shapes.
Experiment with different sketches and settings to explore the full potential of the Loft tool in your Autodesk Fusion designs.
Also, if you are interested to learn ” how to move an Object to the origin in Autodesk Fusion “check out this detailed blog.