In this article, you will learn about 3D printable enclosures for Raspberry Pi 4 using Autodesk Fusion 360.
In this tutorial, I am going to teach you the enclosure design for your Raspberry Pi 4 using Autodesk Fusion 360.
Autodesk Fusion 360 is a cloud-based CAD/CAM software, designed by a well-known company called Autodesk.
This software is mostly used in the Engineering & CAD/CAM industry.
Since it is cloud-based, it is very easy to access your designs, documents, and 3D models on any device around the world.
Also, this makes it easy to collaborate with other professionals around the globe.
I divided this complete tutorial into two parts. So, you can follow step by step.
Step 1: How to upload the Raspberry Pi 4 Step file into Fusion 360.
The first step we have to do is, we need to find the Scale (1:1) 3D model of Raspberry Pi 4 PCB and other components from free platforms like GrabCAD, Thingiverse, etc. in a STEP file format.
From these platforms, you will able to download the model files free of cost for your non-commercial uses.
Then we will save all the component’s CAD files preferably in STEP/STL file format in a local folder on our PC/computer.
To get an overview of supported file formats in Autodesk Fusion 360, click on the link: Supported File format
Now we will start uploading all the component’s CAD files in Fusion 360 inside a separate Folder.
Follow all the steps below in the video to upload your CAD files to Autodesk Fusion 360 successfully.
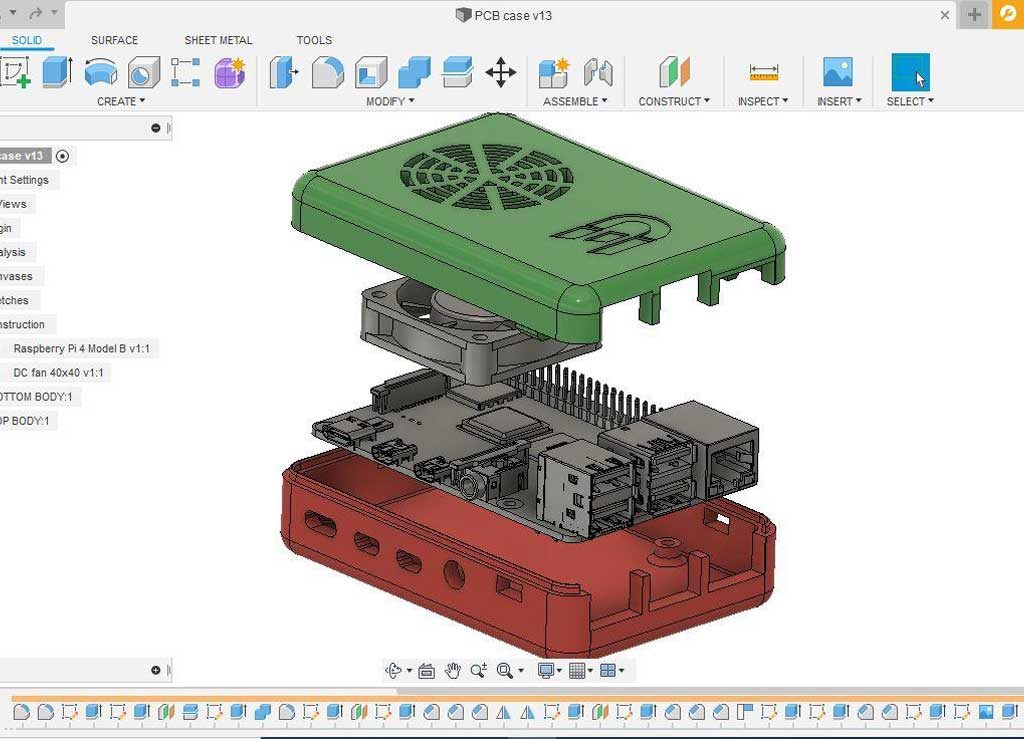
Once you are finished uploading all the components of your Raspberry Pi and its components, you can create a new Design file and save it with the “PCB enclosure” name.
Now insert all your components into the current design file and rearrange the components with respect to origin.
Make sure that the design units you selected are correct. For example Millimeter, Feet, Inches, etc.
Now you are ready to start the 3D modeling of the 3D Printable enclosure for your Raspberry Pi.
Follow along with the Final part of this tutorial ie. Part 2 to finish the enclosure design that is 100% 3D printable.
When you have completed the final Top and bottom part of your enclosure, save both files in STL file format to use them for 3D printing.
And please don’t forget to put your comments or feedback about the process, whether it’s helpful for you or not.
Also if you would like to learn more about Autodesk Fusion 360 and 3D printing check out this complete course on ” Design for 3D printing using Autodesk Fusion 360“.